
On 5 May 2006, the eve of Singapore's Polling Day, PM Lee described other political parties as follows:
"They fly a kite and see if it catches the wind. If it doesn't, they let it go, fly another one. (If it still) doesn't, fly another one, and finally if it doesn't fly or no wind, then they give up flying kites and go play with some other games, marbles or something like that..."
PM Lee could well have been describing my childhood hobby of kite flying. In the 1960s, the phrase "go fly a kite" had a very different meaning from what it means today. It literally meant that we went kite flying. In those days, many Singaporean families were poor and ours was no exception. Hence we made or improvised most of our toys ourselves, usually from recycled materials which were free of charge.
I will describe how I made my own kite even though very nicely-made painted ones were available from the neighbourhood
mama shops for only 10 cents a piece. In comparison, the cost of my self-made kite was next to nothing. The time spent to make the kite was only about 5 minutes as I was a fast worker. However, perhaps the most important thing was the great satisfaction and pride which I derived from making my own kite.
First, the materials required:
Tracing paper, 2
Sapu Lidi sticks, glue, a pair of scissors and a reel of string.

a. Tracing paper.
This item was actually the wrapper which came free with our French loaves. No Delifrance in those days, only the humble neighbourhood bakery which supplied them hot and fresh from the oven at only 15 cents a loaf. Sometimes I had to fight with my siblings over the tracing paper because they needed to use it for tracing maps while I wanted it for making my kite. For this demo, I bought the roll of the tracing paper from a provision shop for 20 cents.
b. Two
Sapu Lidi Sticks.
These sticks were obtained from the sweeper's broom. Don't ask me why the broom was called
Sapu Lidi. Sapu is a Malay word which means "sweep". Maybe
Lidi happened to be the name of the sweeper lady then. We stole these sticks from the broom by just pulling them out. The neighbourhood kids pilfered so much of the sticks that when the sweeper picked up the broom the next morning, all the remaining sticks just fell out of the broom. (For those who do not know, the sticks actually come from the coconut leaf.)


c. Glue, a reel of string and a pair of scissors.
These items were kindly "donated" by my mother. Actually I sort of helped myself to the items in the drawer without asking my mum.
Now we are ready to get down to business.
What To Do
1. Cut out a 14-inch square of tracing paper. You can do this more easily by folding across the diagonal of the square first before cutting:

2. Break off enough of the thinner end of one of the sticks so that the longer stick that remains is about 2 inches shorter than the diagonal of the square. Place the stick on a diagonal of the square so that one end touches one of the corners of the square. Glue and fold the other corner of the paper over the stick to secure it. Cut out 2 little pieces of 2-inch square tracing paper and apply glue one side of the 2 pieces of paper. Use one piece to secure the other end of the stick and the other piece to secure the middle of the stick.

3. Bend the other stick into a curve and break off the extra length of the thinner end of stick so that the ends of the remaining thicker stick is long enough to just touch the other 2 corners of the big square tracing paper when the stick is bent into a curve. (The purpose of bending the stick is to make the kite taut enough to catch the wind when flying.)
4. Apply glue at the other 2 corners of the big square paper and fold them over to secure the bent stick in place.
5. Punch tiny holes in the kite at the positions indicated and thread a doubled-up string through the holes and secure the string. The string should be tied such that the front section of the string is slightly shorter than the rear section. (If both sections are of the same length the kite will not fly and if the rear section is longer than the front, your kite will fly backwards.)

6. Cut the remaining tracing paper into long thin strips, join them together with glue and attach the strips to the tail end of your kite to make a long tail. (The tail makes the kite more stable in flight.)
7. Paint the kite if you want to, attach a reel of string to the kite and you are ready for your kite to catch the wind.
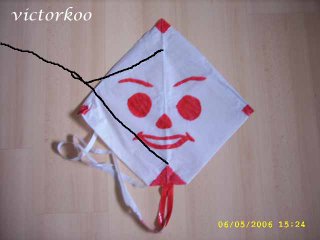
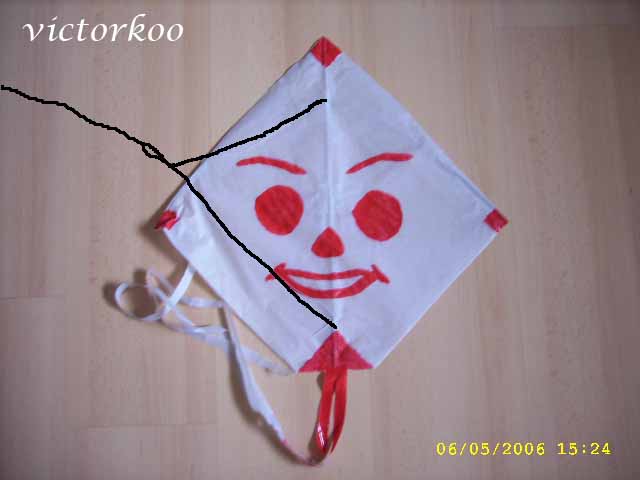
If it can't fly, make another one. If after several attempts and your kite still doesn't fly, then go and play some other games like marbles.






 Posts
Posts


